


![Top 11 Real Estate Mobile App Developers in Riyadh, Saudi Arabia [2025 Edition]](https://www.philadelphialivenews.com/uploads/images/202506/image_430x256_68621a9e48997.jpg)


How to Prep Your Soil Before Any Sod Touches It
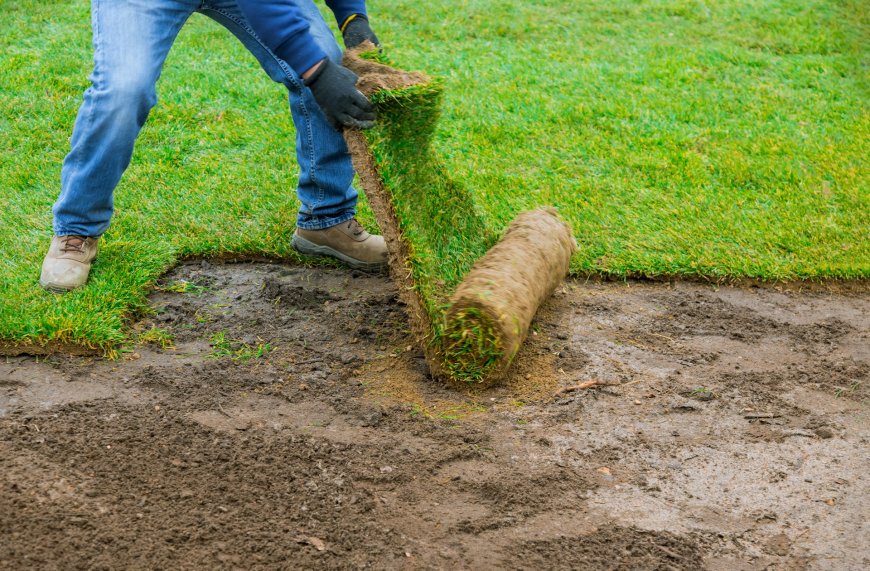
Getting sod installation wrong from the start gonna cost you more latermoney, time, and a yard that looks worse than before. Before any square of Bermuda grass, Zoysia, or St. Augustine sod touches the ground, your soils gotta be right. You cant just mow the old grass and slap new turf over it. Thats not prep, thats a shortcut, and it aint gonna last.
First, Know What You're Working With
You ain't gonna fix a problem you dont understand. Grab a handful of your dirt, squeeze it. Does it stay clumped? Thats clay. Falls apart like powder? Thats sandy. Sticky and wet? Thats loamy. You want more loamy soil, less junk. Most grasses, especially warm-season turfgrass like Bermuda sod, do better in well-draining, nutrient-loaded loam.
For accuracy, get a soil test. County extension offices or local garden centers sometimes offer cheap testing. They'll tell you the pH, nitrogen, phosphorus, and potassium levels. Grass aint picky, but it ain't dumb either. Ideal soil pH for sod? Between 6.0 to 7.5 for most Texas grasses. Some like Zoysia handle slightly acidic better. Clay-heavy yards in places like Fort Worth or Grand Prairie tend to be more alkaline.
Kill Whats Already There
Dont try to work around existing grass. That old stuff, whether it's dead crabgrass, patchy weeds, or leftover fescue, will push back later. Spray a non-selective herbicide (like glyphosate) on everything green. Then wait 10 to 14 days. Two weeks later, water the area a bit, then see if anything pops up again. If it does? Spray again.
This step ain't optional. It's the only way you make sure your new sod grass dont fight old roots or weed seeds trying to come back.
Remove Everything Down to Bare Soil
Old roots, leftover thatch, rocks, construction junkget it all out. Run a sod cutter across the area if it's a large space. For smaller patches, a flat shovel can work, but youre in for a workout. Go 2 to 3 inches deep to strip everything thats not dirt.
Dont forget the roots. Bermuda, for example, grows underground runners called rhizomes. Miss those, and youll have a mix of old and new turf fighting for sunlight.
Fix the Grade Your Lawn Aint Flat (and Thats Okay)
Water should flow away from your house, not puddle near your foundation. Use a long straight board and a level to find high and low spots. Fill in low spots using clean fill dirt or screened topsoil (not compost yet). Slope should be about 1 to 2 percent away from any buildings. Thats about 12 inches drop per 10 feet.
Dont try to get it perfect on the first go. Just no standing puddles or sunken patches. Zoysia sod especially hates poor drainage.
Time for Tilling Loosen It All Up
Once its clean and roughly leveled, bring out the rototiller. You wanna go 4 to 6 inches deep, minimum. This breaks up compacted clay and mixes air in. Dont till if the soils too wetyoull wreck it. Test it first. Grab a clump, if it breaks easily, youre good. If it smears or sticks, wait a day.
Mix in organic matter while tilling: compost, peat moss, or rotted manure. About 2 to 3 inches on top, then till it all together. That helps the roots grow quicker and deeper once the sod rolls are laid down.
Adjust the Soil pH Use the Test Results
From your earlier test, if soils too acidic (low pH), mix in agricultural lime. If too alkaline (high pH), add elemental sulfur. Follow the amounts on the bagits not guesswork. You only get one shot before the sod covers everything up.
In some areas across Texas, like Mansfield or Arlington, the dirts naturally high in lime. If youre planting St. Augustine grass, it can tolerate more alkalinity, but Zoysia prefers balanced pH.
Fertilizer Goes Down First
Before any sod touches your yard, sprinkle a starter fertilizer across the surface. Something like 10-10-10 or 16-16-8, with balanced N-P-K levels. Dont use high nitrogen right awayitll push top growth before roots can keep up. And no weed preventers yet. Theyll kill off the roots before they even begin.
Broadcast it evenly and then rake it in lightly, about 1 inch down.
Final Grading Flatten But Dont Compact
After tilling, raking, leveling, and fertilizingyoure nearly done. Now use a lawn roller (half-filled with water) to firm the surface just a little. This settles it enough so your sod lays flat and wont shift around. But dont pack it tightroots need loose soil to grow into.
Also, irrigation. If you havent already set up a sprinkler system or soaker hoses, nows the time. Trying to install irrigation after the sod is laid? Thats a mess. Especially with St. Augustine sod, which needs regular watering the first 2 weeks.
Water the Soil Before Laying Sod
A moist base layer helps sod roots grab hold quicker. Not soaked. Not dry. Water the prepared soil a day before installation. When you walk across it, you shouldnt leave deep footprints. Just damp enough that it feels cool 2 inches down.
Some folks skip this. And then wonder why their Bermuda sod curls up or dies off in 3 days.
Last Checks Before You Call It Ready
-
No footprints or holes? Good.
-
Drainage works right? Pour a bucket of water. Watch where it goes.
-
Even surface with no big dips or clods? Rake again if needed.
-
Fence line or driveway edges? Check for buildup that could block water.
Once youve done all this, youre finally ready to install grass sod. Most suppliers like Texas Sod Zilla (texassodzilla.com) recommend same-day laying. Sod dies quick if left rolled up in heat.
Bonus: Avoid These Mistakes
Dont install over compacted soil. Grass wont root.
Dont skip the soil test. Guessing kills more lawns than bugs.
Dont wait too long after prep. Rain or sun can undo your grading fast.